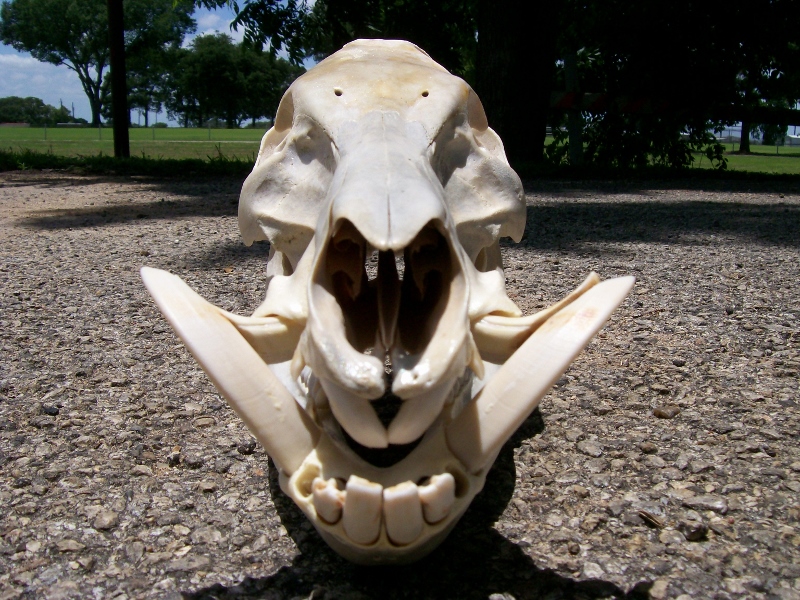
DO-IT-YOURSELF SKULL MOUNT
By Cody Weiser
A European skull mount is a cheap way to display your trophy boar on a budget. For those who like to do-it-yourself, you can complete this project for under $5 and have a beautiful show piece that will last a lifetime.
There are many methods used to clean a hog skull. Some require the use of harmful or expensive chemicals. I’ve adopted a more simple method that takes a little longer, but produces great results and uses minimal supplies.
The first thing I do is skin the head out and try to remove as much meat and tissue as possible. Then I find the largest ant mound on the place and set the skull directly on top. I cover it with a 5 gallon bucket that has a few holes drilled in the side (for air circulation) and place a cinder block on top (to keep dogs and coons from flipping it over). Give the skull at least a month or two if it is cooler outside. After the meat is removed by the ants and flies, take the skull and put it in a bucket and cover it with water. Give the skull a month to let it become covered with algae (it will turn green). This algae will eat what tissue is left and is the key in removing the fat/grease from the jaw bone.
The jawbone is packed with grease that ruins many European skull mounts which are rushed. If you have a European mount that begins to stink or turn yellow under the jaw, then you can be certain the fat was not removed. Many “quick” mounting techniques are not successful at removing this grease.
After the skull has been completely green in the water for a few weeks, take it out and scrub it with a brush. Once scrubbed, bring enough water to a boil to submerge the skull. Add a cup of baking soda and a cup of bleach to the water. Submerge the skull and boil for only 10 minutes. (Longer boiling will cause the skull to become brittle.) Remove the skull and set it aside.
Mix together a paste of baking soda and hydrogen peroxide. Brush this over the skull. Set the skull in the sun and let dry. When the paste is dry, wash it off with clean water. After all the paste is washed off, let the skull dry completely.
Once everything is dry, replace any teeth that have come loose and use a drop of superglue at the base of each to hold it in place. Also, set tusks into place and glue at base with superglue.
When the glue is dry, hang the skull from a wire and spray with matte clear coat spray paint. (I like a more natural bone color…some people spray them with flat white paint.) I usually give it about 3 coats. Once the paint is dry, glue the bottom jaw to the skull (if you want one piece) and display.
It sounds like a lot of steps, but the mount is done right and really turns out nice. You won’t have to worry about a skull that will start smelling. You can complete the entire project with simple household supplies plus a can of spray paint. Enjoy your mount!

